

"Learn how to remove hair tinsel beads at home safely and effectively. Discover step-by-step instructions for taking out hair tinsel extensions without causing damage. Get expert tips on 'How to Remove Hair Tinsel Beads at Home' for a hassle-free process."
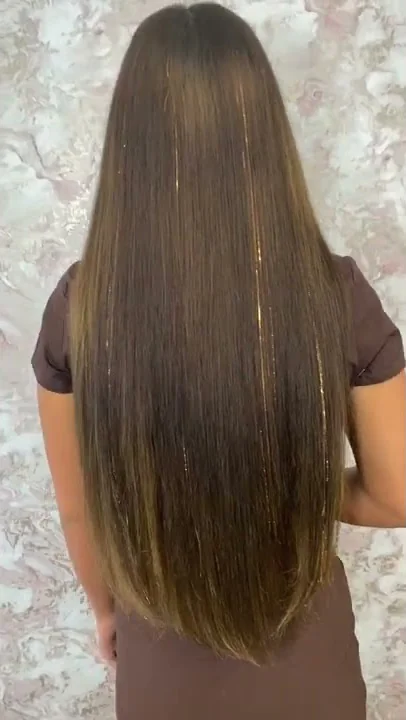
Hair tinsel has become a trendy way to add a touch of sparkle to your locks. Whether you've worn it for a special event or just want to change your look, there comes a time when you'll need to remove those tiny tinsel beads from your hair.
Removing hair tinsel beads at home is a straightforward process, and with the right steps, you can do it safely without damaging your hair.
In my comprehensive guide, we'll take you through the process step by step, as well as provide insights into removing micro bead extensions without pliers and precautions to take during the removal process.
How to Remove Hair Tinsel Beads at Home
I did ok for my first time adding tinsel. Just need to leave out more hair to cover the beads that keeps the tinsel in place. Pls don't look at how bad my knots are either and yes I know my lace lifting, I just slapped it on and its not glueless.😭😭😭 Gotta give a disclaimer cus pic.twitter.com/OMRK50ksRs
— RocDaThroatgoat215(He/him) (@tyrant7654321) August 4, 2023
Materials You'll Need:
- Wide-tooth comb
- Hair conditioner or detangling spray
- Fine-tooth comb
- Small scissors
- Patience
Step 1: Prepare Your Workspace
Start by setting up a comfortable and well-lit workspace with a mirror. You'll want to have easy access to your hair and the tools you need.
Step 2: Detangle Your Hair
Begin by gently combing through your hair with a wide-tooth comb to remove any knots or tangles. This step is crucial to prevent unnecessary pulling or breakage during the removal process.

Step 3: Apply Conditioner or Detangling Spray
Apply a generous amount of hair conditioner or detangling spray to the area where the tinsel beads are attached. This will help make the tinsel and surrounding hair more slippery, making it easier to work with.
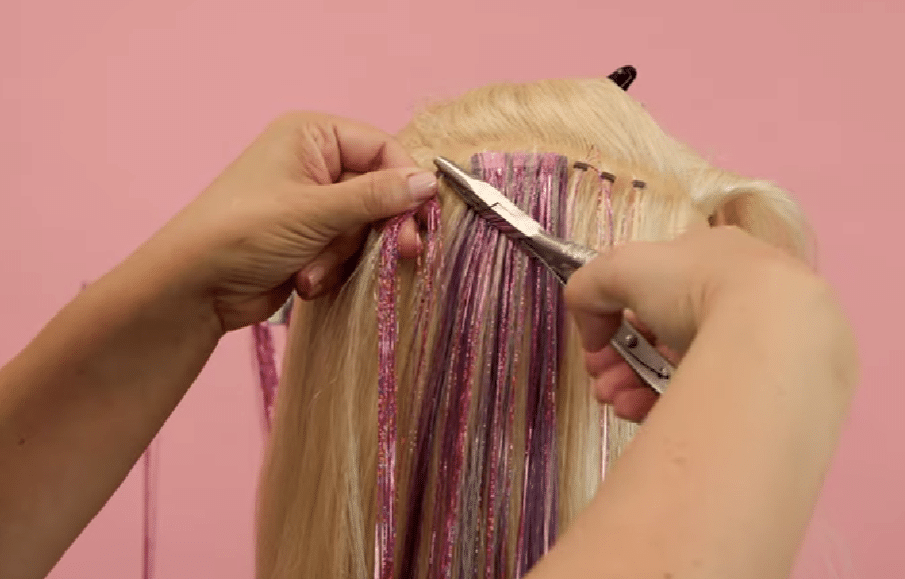
Step 4: Isolate the Tinsel Strand
Identify the hair tinsel strand that you want to remove. Gently separate it from the surrounding hair, so you can work on it without interference.
Step 5: Locate the Bead
Examine the tinsel strand, and you'll notice a small, cylindrical bead holding it in place. The bead is usually made of silicone or metal and can be silver, gold, or clear.
Step 6: Hold the Bead
With your thumb and index finger, hold the bead firmly but gently. Be careful not to pinch your scalp or pull on your hair too hard.
Step 7: Squeeze the Bead
Apply gentle pressure to the bead with your fingers. The goal is to slightly flatten the bead so that it loosens its grip on the tinsel strand.
Step 8: Slide the Bead Down
While maintaining pressure on the bead, use your other hand to slide it downward along the tinsel strand. Be patient and take your time, ensuring that you don't pull or tug on the tinsel.
Step 9: Remove the Bead
Once the bead has slid down to the end of the tinsel strand, gently remove it from your hair. If the bead is resistant, do not force it; instead, try to squeeze it a bit more to loosen it.
Step 10: Slide Out the Tinsel
With the bead removed, carefully slide the tinsel strand out of your hair. If you encounter any resistance or knots, use a fine-tooth comb or your fingers to gently work through them.
Step 11: Repeat as Needed
Repeat the above steps for each tinsel strand you want to remove. Take your time to avoid any hair damage or discomfort.
Step 12: Wash and Condition
After all the tinsel strands are removed, wash your hair with a gentle shampoo and follow up with a nourishing conditioner to restore moisture and keep your hair healthy.
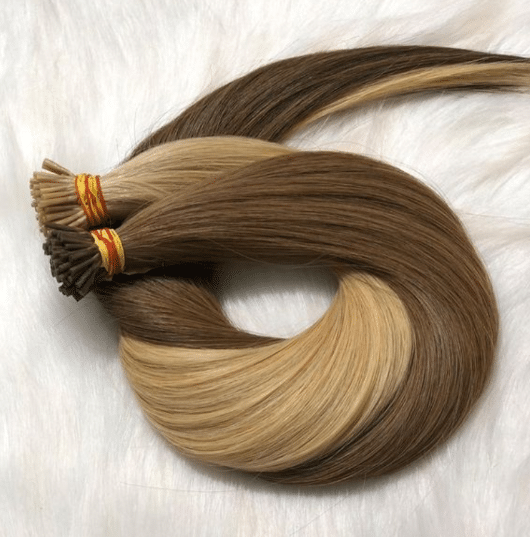
How to Remove Micro Bead Extensions Without Pliers
Removing micro bead extensions without pliers is possible, although it may require a bit more patience and care. Here's how to do it:
Materials You'll Need:
- Wide-tooth comb
- Hair conditioner or detangling spray
- Fine-tooth comb
- Small scissors
- Patience
Step 1: Prepare Your Workspace
Set up a comfortable workspace with good lighting and a mirror. Ensure you have easy access to the extensions you want to remove.
Step 2: Detangle Your Hair
Start by gently detangling your hair using a wide-tooth comb. This step is crucial to prevent damage when removing the extensions.
Step 3: Apply Conditioner or Detangling Spray
Apply a generous amount of hair conditioner or detangling spray to the area where the micro bead extensions are attached. This will help make the extensions and your hair more slippery and easier to work with.
Step 4: Isolate the Extension Strand
Identify the micro bead extension strand you want to remove. Gently separate it from the surrounding hair, so you can work on it without interference.
Step 5: Locate the Bead
Examine the extension strand, and you'll notice a small, cylindrical bead holding it in place. This bead is usually made of silicone or metal.
Step 6: Hold the Bead
With your thumb and index finger, hold the bead firmly but gently. Be careful not to pinch your scalp or pull on your hair too hard.
Step 7: Squeeze the Bead
Apply gentle pressure to the bead with your fingers to slightly flatten it. This will help loosen its grip on the extension strand.
Step 8: Slide the Bead Down
While maintaining pressure on the bead, use your other hand to slide it downward along the extension strand. Be patient and take your time, ensuring that you don't pull or tug on the hair.
Step 9: Remove the Bead
Once the bead has slid down to the end of the extension strand, gently remove it from your hair. If the bead is resistant, do not force it; instead, try to squeeze it a bit more to loosen it.
Step 10: Slide Out the Extension Strand
With the bead removed, carefully slide the extension strand out of your hair. If you encounter any resistance or knots, use a fine-tooth comb or your fingers to gently work through them.
Step 11: Repeat as Needed
Repeat the above steps for each micro bead extension strand you want to remove. Take your time to avoid any hair damage or discomfort.
Step 12: Wash and Condition
After all the extensions are removed, wash your hair with a gentle shampoo and follow up with a nourishing conditioner to restore moisture and keep your hair healthy.
5 Precautions You Can Take While Removing Micro Bead Extensions
When removing micro bead extensions, it's essential to take precautions to ensure that the process is as safe and gentle as possible for your hair. Here are five precautions to keep in mind:
1. Be Patient: Take your time when removing each extension. Rushing the process can lead to hair damage and discomfort.
2. Use Conditioner: Apply a generous amount of hair conditioner or detangling spray to make the extensions and your hair more slippery, reducing the risk of breakage.
3. Handle Beads Gently: When squeezing and sliding the beads, be gentle to avoid pulling or t
ugging on your hair.
4. Avoid Cutting: While it might be tempting to cut the extensions out, it's best to avoid using scissors near your hair, as this can lead to uneven and damaged ends.
5. Seek Professional Help: If you encounter difficulties or are unsure about the removal process, it's always a good idea to consult a professional stylist or hair extension specialist who can safely remove the extensions for you.
Are Micro Bead Hair Extensions Difficult to Remove?
Micro bead hair extensions can be removed without difficulty if done correctly and patiently. The process involves gently squeezing and sliding the beads to release the extension strands. While it might seem daunting at first, with practice and care, you can successfully remove micro bead extensions at home. However, it's crucial to follow the steps outlined above and take your time to avoid hair damage.
Will Micro Bead Hair Extensions Damage My Hair If Left On for Too Long?
Leaving micro bead hair extensions on for an extended period can potentially damage your natural hair. Here are some reasons why:
1. Natural Hair Growth: As your hair naturally grows, the extension strands move away from the scalp, which can cause stress on your hair and lead to tangling or matting.
2. Maintenance Issues: Over time, the extensions may become more difficult to manage and detangle, increasing the risk of damage during removal.
3. Bead Tightening: The beads used to attach the extensions may need periodic tightening to maintain a secure hold. If this is neglected, the extensions can become loose and cause hair damage.
4. Natural Shedding: Your natural hair sheds daily. Extensions left on for an extended period may hinder the natural shedding process, leading to hair breakage.
To avoid potential damage, it's recommended to follow the recommended wear time for micro bead extensions, which is typically around 6 to 8 weeks. Regular maintenance and proper care during this time can help preserve the health of your natural hair.
How to Remove Hair Tinsel With Clamp

Removing hair tinsel with a clamp is a variation of the removal process, particularly useful when the tinsel strands are tightly secured. Here's how to do it:
Materials You'll Need:
- Wide-tooth comb
- Hair conditioner for detangling spray
- Fine-tooth comb
- Small scissors
- Clamp tool (micro ring clamp or similar)
Step 1: Prepare Your Workspace
Set up a comfortable workspace with good lighting and a mirror. Ensure you have easy access to the tinsel strands you want to remove.
Step 2: Detangle Your Hair
Gently detangle your hair using a wide-tooth comb to prevent damage during the removal process.
Step 3: Apply Conditioner or Detangling Spray
Apply a generous amount of hair conditioner or detangling spray to the area where the hair tinsel is attached.
Step 4: Isolate the Tinsel Strand
Identify the hair tinsel strand you want to remove and separate it from the surrounding hair.
Step 5: Locate the Bead
Examine the tinsel strand to find the small, cylindrical bead holding it in place. This bead is usually made of silicone or metal.
Step 6: Use the Clamp
Hold the clamp tool, such as a micro ring clamp, with one hand. With your other hand, gently squeeze the clamp to open it.
Step 7: Position the Clamp
Position the opened clamp tool around the bead that's securing the tinsel strand. Ensure the bead is within the clamp's jaws.
Step 8: Squeeze the Clamp
Gently squeeze the clamp tool to compress the bead. The goal is to flatten the bead and release its grip on the tinsel strand.
Step 9: Slide Out the Tinsel
With the bead flattened, use the clamp tool to slide it down the tinsel strand toward the end.
Step 10: Remove the Bead
Once the bead has slid down to the end of the tinsel strand, use your fingers to remove it from your hair.
Step 11: Slide Out the Tinsel
After the bead is removed, carefully slide out the tinsel strand from your hair. Be gentle to avoid any tugging or pulling.
Step 12: Repeat as Needed
Repeat the above steps for each tinsel strand you want to remove, using the clamp tool. Be patient and take your time.
Step 13: Wash and Condition
After all the tinsel strands are removed, wash your hair with a gentle shampoo and follow up with a nourishing conditioner to restore moisture and maintain hair health.
Removing hair tinsel with a clamp can be effective, especially when dealing with securely attached tinsel strands. However, it requires some skill and precision, so be careful and consider seeking professional assistance if needed.
In conclusion, removing hair tinsel beads or micro bead extensions at home is entirely possible with the right tools and techniques.
It's essential to prioritize the health of your natural hair during the removal process and to be patient and gentle throughout. With practice and care, you can safely enjoy the freedom to change your look whenever you desire.
Also Read:
Ways to Remove Hair Gel from Hair Without Washing
How To Remove Hair Dye From Sink